How to view data products outside of Ground Control
Ground Control offers the ability to download various outputs of your data products in order to view/share them offline. Please note that due to filesizes and data complexity, the majority of data product outputs cannot be viewed in a native image viewer (e.g. Windows Photo viewer, OSX Preview) on a computer and requires specialized software. The steps below describe how to view different data product outputs.
For all Data Product Outputs
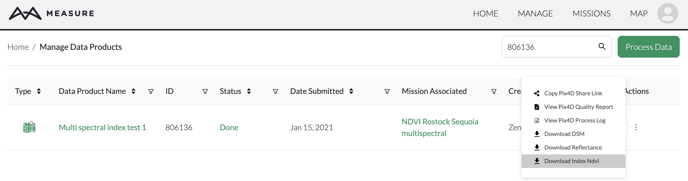
- Go to Manage -> Data Products. Find the data product that contains the data you want to download. From here, click the ... actions menu button, and download the data you need:
- Install a GIS software if you don't already have one. QGIS is a free open-source solution. The instructions below will be specifically for QGIS, but the data management process should be similar across other GIS platforms. Open QGIS.
2D Products (Orthomosaics, DSMs, Contours, NDVI, Thermal, etc.)
Viewing Orthomosaics/DSMs:
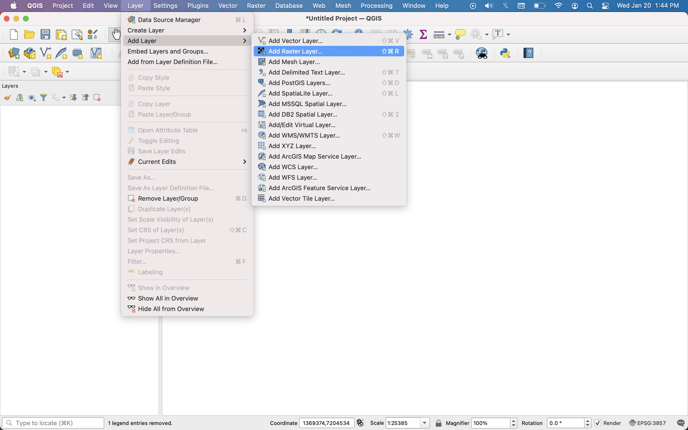
- Go to Layer -> Add Raster Layer:
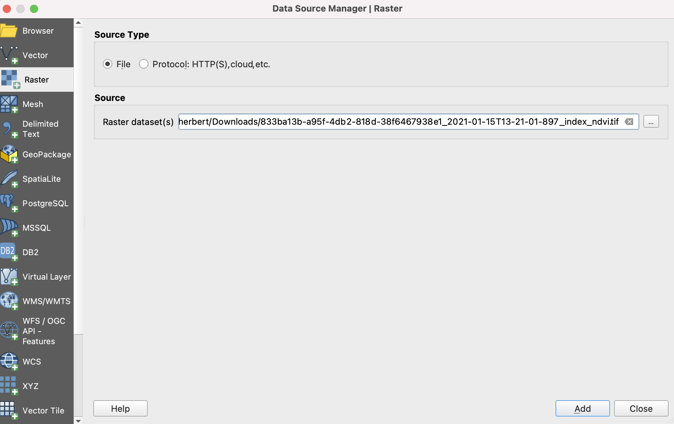
- Click on the ... to select your downloaded file and then click add Click Add:
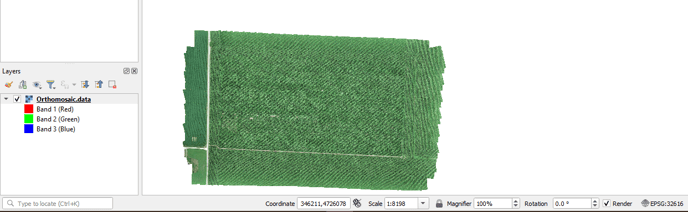
- The layer will now be added to the list on the left. If you are viewing RGB/standard data (orthomosaics, DSMs, Contours) you will see the RGB Bands on the left-hand side. The coordinate system for the data is displayed in the bottom right corner. If you are viewing an advanced data product output (NDVI, Thermal Index map, other indices), you will see the data range for the values in the index map:
- Orthomosaic/DSM view:
Contour Lines:
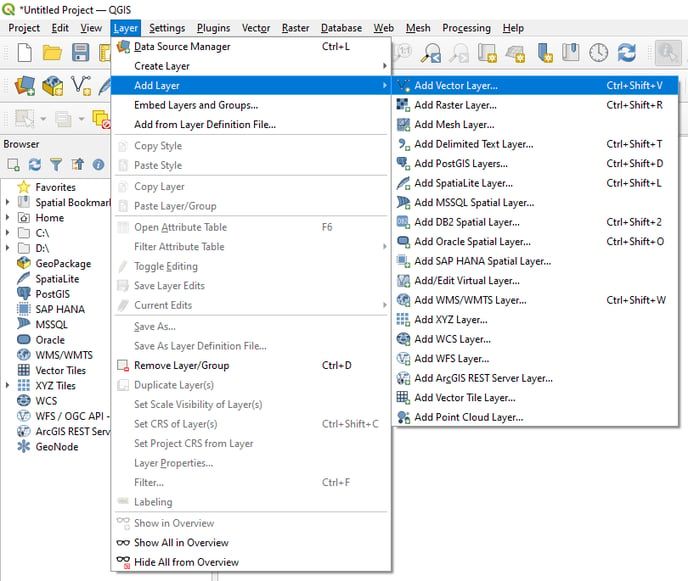
- Contour lines. Once the Contour bundle has been downloaded, extract the files to a folder. Ensure all files are extracted. Open QGIS and Go to Layer -> Add Layer -> Add Vector Layer. You can click on Identify features tool and click on the contour layers to see their elevation data:
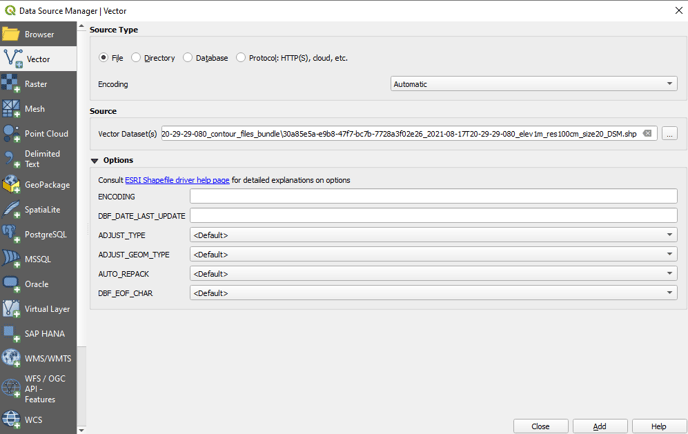
- Browse to the .shp file for your contour file and click add. Leave all settings left as default.
- From here your contour layer will be displayed on the map. You can click on the identify features tool to click on one of the contour lines and get its elevation:
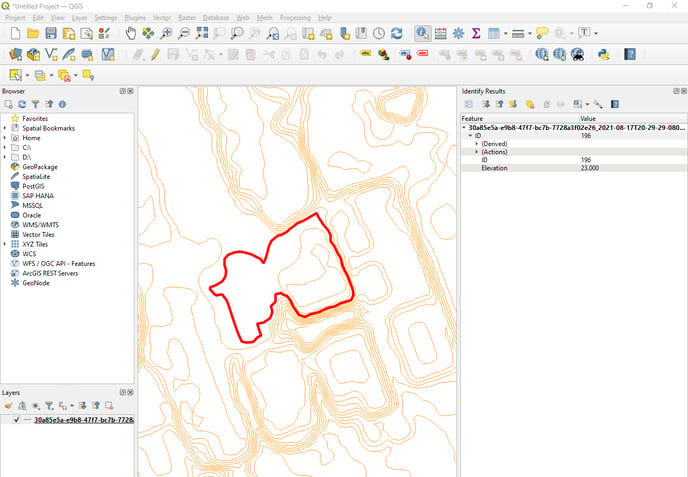
Note: Unless a feet-denoted coordinate system is specified then the elevation data will be in meters. If contour data is needed in another unit, please see the article How to convert data.
Viewing Advanced Data (NDVI, Thermal Data, Indices, etc.)
- Review the steps above for adding an orthomosaic to QGIS and then continue with the steps below.
- Right-click on the layer -> properties:
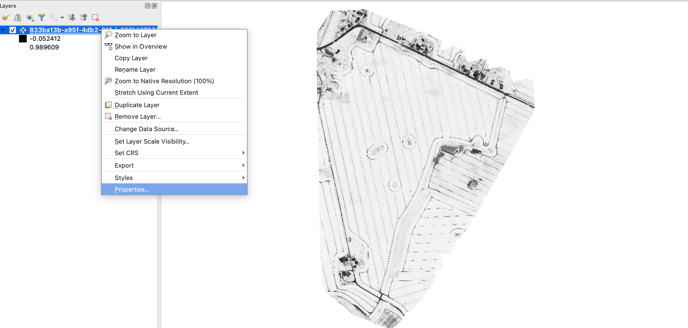
- Go to Symbology, change render type to single band pseudocolor, and choose the following color ramp based on your data:
NDVI/other indexes: RdYlGr
Thermal: Magma
Note: These are just recommendations for color ramps to visualize data.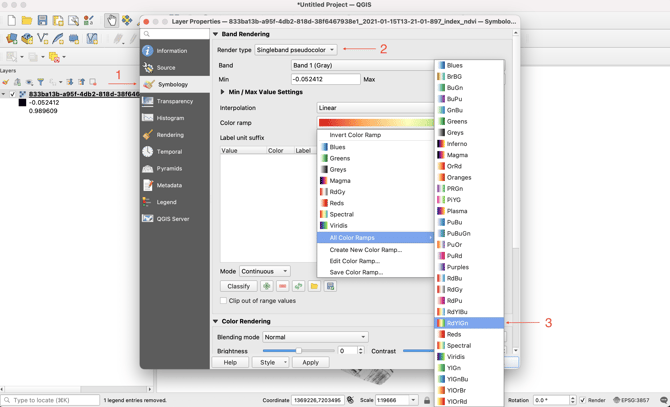
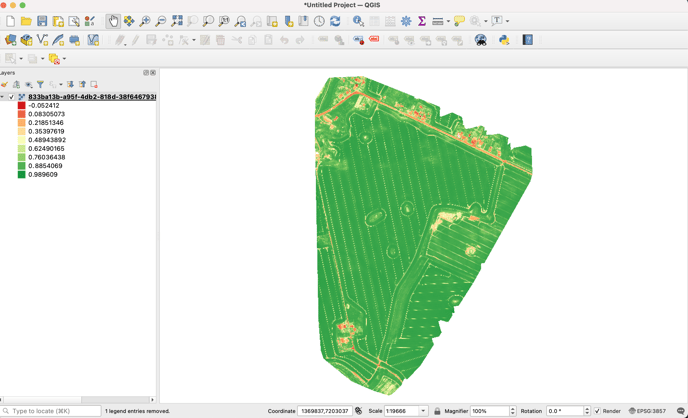
- Click OK in the bottom right corner. The color ramp for your index/thermal data has now been updated:
Viewing 3D Data Products (3D Meshes, Point Clouds)
All 3D Data Products can be visualized via a free software called CloudCompare.
Viewing 3D Meshes
- After you've downloaded your 3D Mesh, extract the files to a folder.
-
NOTE: you must extract all files to the same folder, and you should NOT edit the names. There are internal linkages between the files that will fail to associate if the files are renamed. You can name the enclosing folder that you use whatever you like.
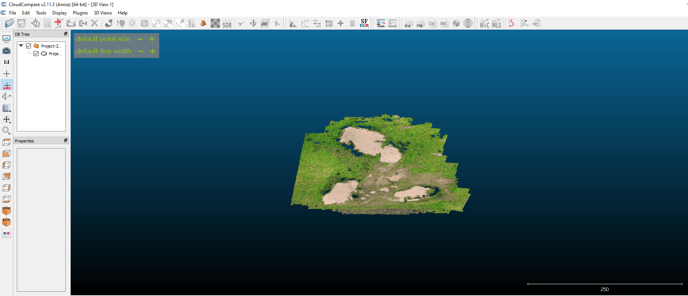
- After you've extracted the files. Open CloudCompare and go to File -> Open. Choose the OBJ file:
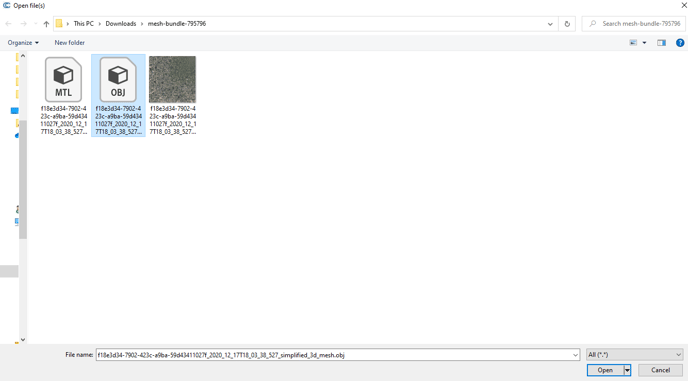
- You can now view the data!

Viewing 3D Point Clouds
- NOTE: Point Clouds are not currently available for direct download. If you need a Point Cloud file please email support@measure.com.
- After you have downloaded your Point Cloud open CloudCompare and go to File -> Open. Choose the LAS file:
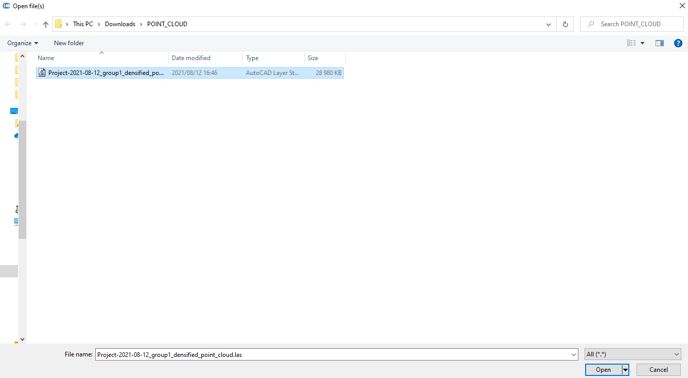
- Apply any recommended settings and then you're ready to view your data!
Related Articles:
Have questions or feedback? Please contact support.groundcontrol@ageagle.com