Fly an automated grid flight using the MGC Mobile App
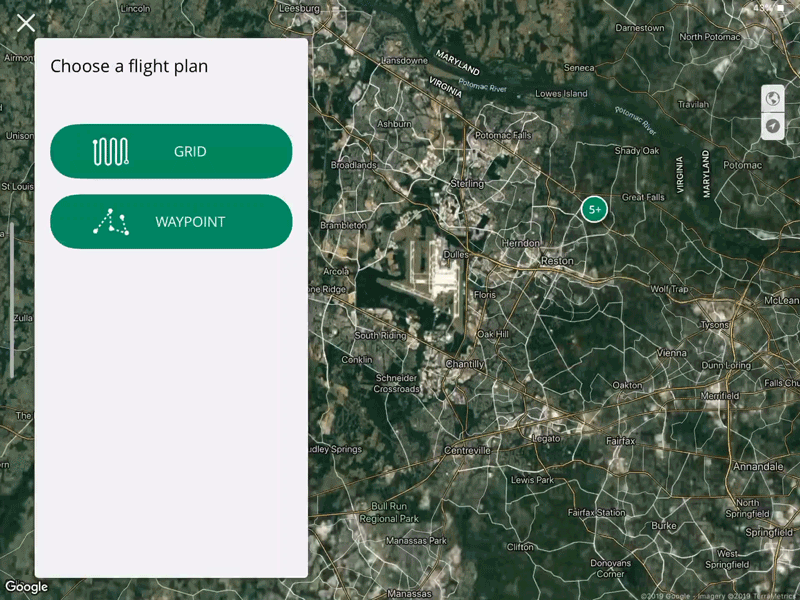
Measure Ground Control features two autonomous flight modes, grid and waypoint mode. Each mode enables a pilot to plan and execute a choreographed flight or set of flights, ensuring repeatable and standardized data collection in the field. Automated flight modes are found in the Flight Plan section of the MGC Mobile App.
Before conducting any automated flights, review the manual flight overview for the MGC Mobile App. Pilots conducting automated flights should always be ready to take manual control of the aircraft should an emergency situation arise.
This article will provide you a step-by-step guide to the grid functionality, but you can also watch the full video in our Video Tutorials Section labeled Full Grid Mission Flight.
Accessing a flight plan
To search for or create a new flight plan:
- Tap Flight Plans in the main menu.
- Flight plans that have been created/modified and or saved will be displayed.
- Grid flights are displayed by grid lines
- Waypoint flights are displayed as connected dots
- Tap the flight type to sort by grid or waypoint.
- Once a flight type has been selected the flight plans will be sorted based on proximity, name or date edited.
- Tap the necessary flight plan either by tapping the flight plan/name from the displayed list or tapping the icon on the map.
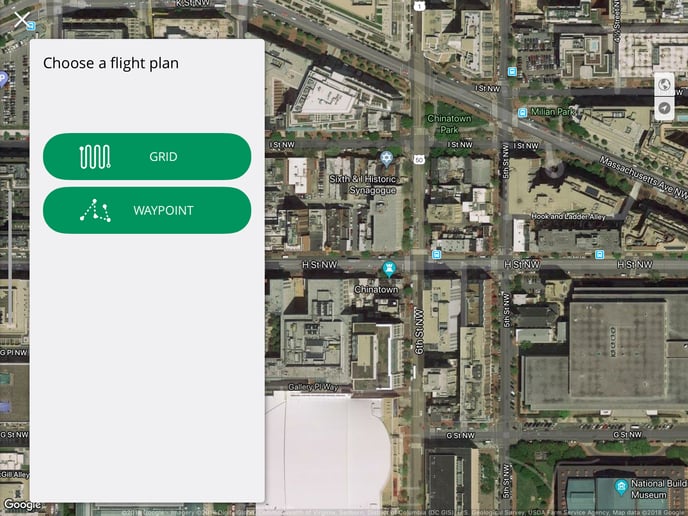
Plan and fly a grid flight
In the Flight Plan section of the MGC Mobile App, choose Grid from the flight plan menu. Previously saved flight plans can also be selected for editing, including flight plans created in the MGC Web Portal and assigned to the active user.
To create a grid flight using a KML/CSV file, click here.
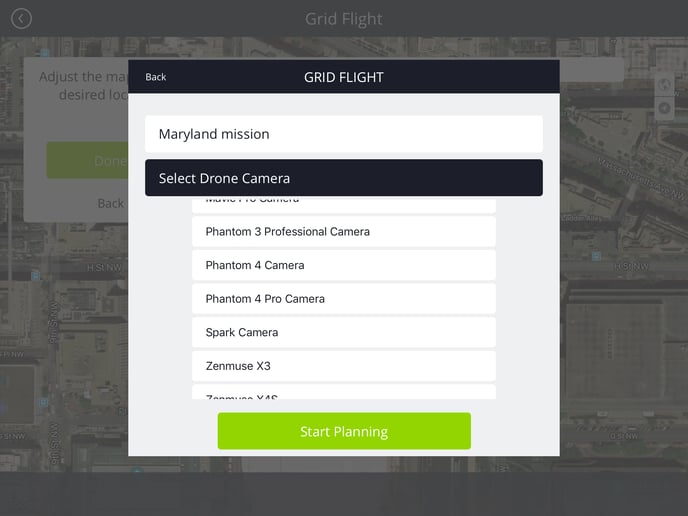
If no mission is currently active, create a new mission using the flight creation form. Select the aircraft and sensor to be used for the flight. Aircraft with fixed cameras/sensors will have a single entry in the drone camera list, e.g. "Phantom 4 Pro Camera."
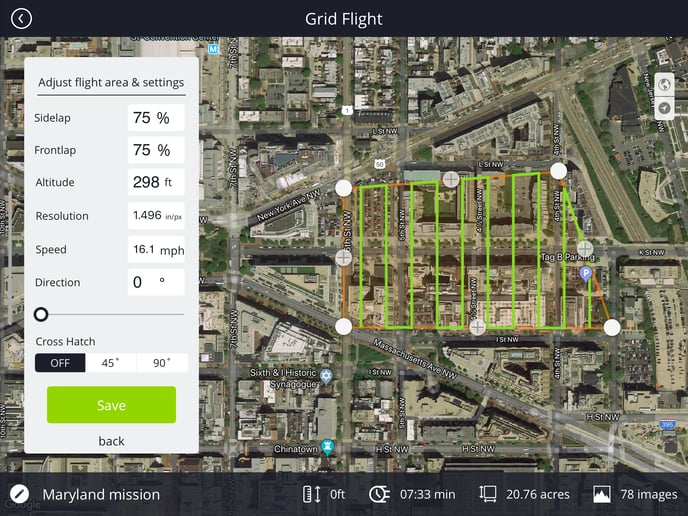
Adjust the map to the desired flight area. By default, the map will center on the device's current location; to relocate simply drag the base layer to the desired location.
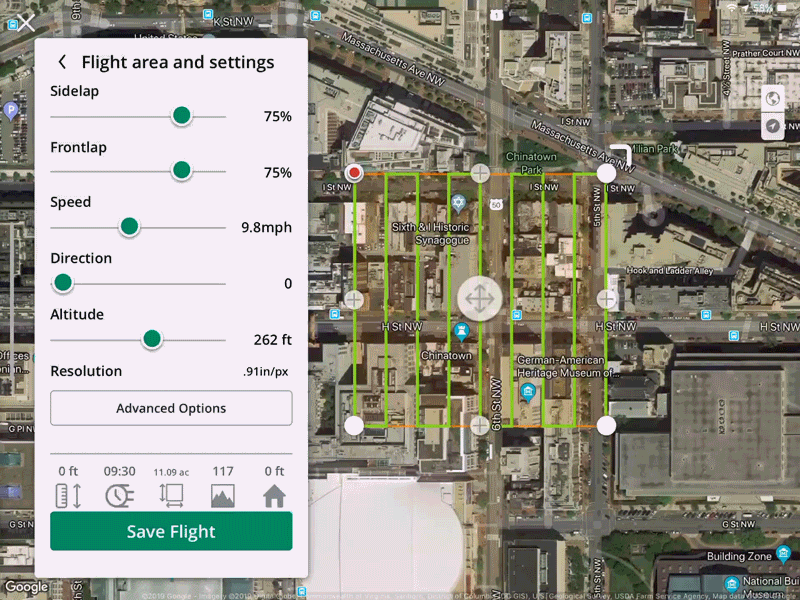
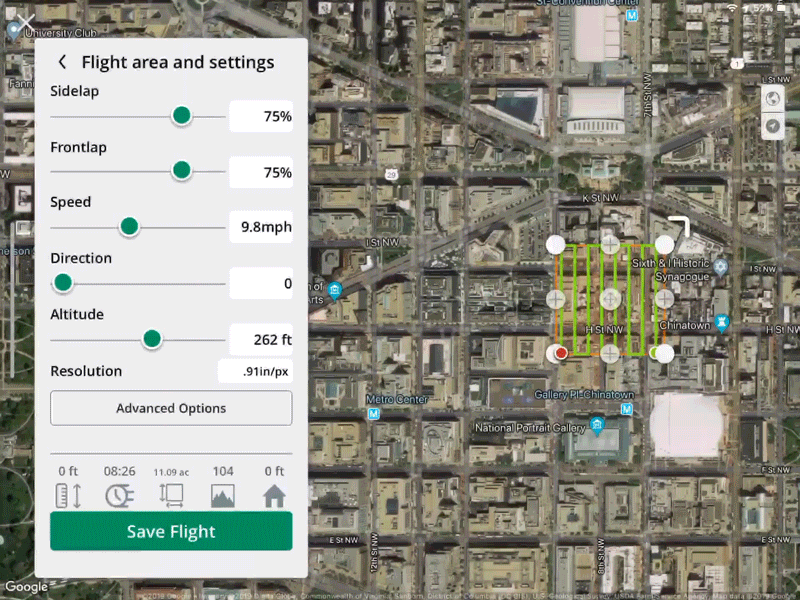
The flight planning tool will automatically generate a flight area composed of a polygon overlaid with a flight path. The flight area can be resized and reshaped by dragging the corner anchors to the desired location. Additional anchors can be added by tapping the "plus" icons at the midpoint of each side.
To edit the flight path parameters, change the values in the flight settings panel. The MGC Mobile App will suggest default parameters based on aircraft and camera. Many available settings can be edited, including:
- Picture front lap/side lap: Percent of each photo that will overlap with the adjacent photos.
- Speed: Airspeed of the aircraft while flying each row.
- Flight direction: Primary heading of aircraft during the flight. Each row will be flown with the aircraft flying at or away from the set heading.
- Margin: Additional capture buffer added to the Northern and Southern sides of the path of travel.
- Altitude: The altitude used by the aircraft when flying. This value is the height above the ground directly below (AGL).
- Resolution(auto-calculated): Ground distance covered per pixel.
- Advanced Options:
- Gimbal angle: Direction of the camera/sensor gimbal. A value of -90 represents a nadir(ground-facing flight).
- Drone Direction: Adjust the direction the drone will be facing relative to the flight. Useful for image capture of solar farms.
- Parallel - Flight plan faces the initial direction of the flight plan and maintains that direction throughout the entirety of the flight, even flying backward where necessary.
- Perpendicular - Drone faces perpendicular to the flight plan at 90 degrees, it attempts to face in a more northerly direction if possible.
- Course Aligned - Drone faces forward throughout the entire flight plan continuously updating direction to face the direction of a row.
- End of Flight Behavior: Choose to have the drone return home or hover in place.
- Crosshatch: Fly an extra grid overlaid on the default grid at a heading offset 45° or 90° from the primary flight direction. Will double flight time and pictures captured. This can help improve image overlap for data processing.
- Switch starting waypoint: switch the point used for the beginning/end of the grid flight.
- Starting Row/Ending Row - Beneficial if there is a need to re-fly a portion of the grid and not the entire grid, the ability to modify the starting grid line and ending grid lines can be set using this option.
The HUD at the bottom of the screen displays flight information for the flight as drawn, including altitude, estimated flight time, the area covered, the estimated number of images to be captured, and distance to home.
Note: The orange polygon represents the area to be captured, and the green line represents the path of travel for the drone. The path of travel is based on if the grid flight is flown in nadir (camera angle straight down, -90). If an oblique camera angle is used, the green path of travel will be the same, but the polygon may no longer be representative of the area captured. If you have any concerns about the area captured with an oblique angle grid flight, we recommend increasing the size of the polygon.
Once the plan is complete, tap Save to save the flight plan. If connected to a drone, the MGC Mobile App will automatically begin a pre-flight check. Once complete, the app will prompt the user to begin the flight. If the flight is started, the aircraft will spin up and begin conducting the mission.
During the flight, the app will automatically control the gimbal pitch and capture images based on the flight plan. Progress can be monitored in the flight app; users can swap between the map mode and the camera feed by tapping the thumbnail in the bottom right corner. To save time between takeoff and the first waypoint a pilot can manually increase the speed of the aircraft.
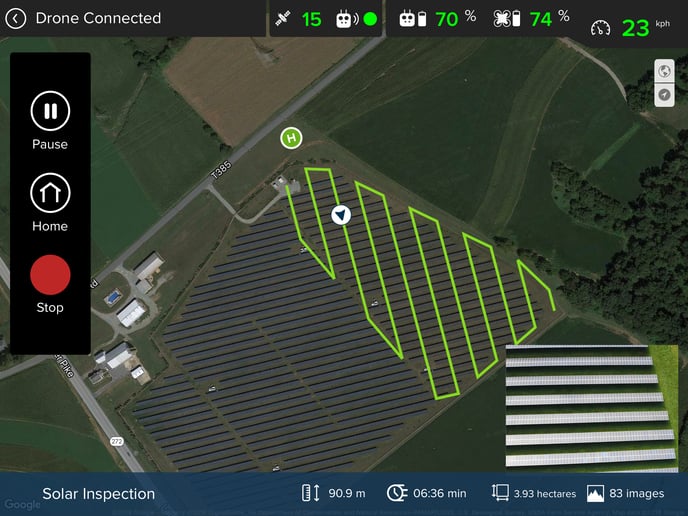
Grid flights can be paused or stopped at any time using the controls on the left side of the screen:
- Pause: Pause the flight and revert to manual control. Upon resuming the grid flight, the drone will return to its last known position during the flight and attempt to continue executing the flight plan.
- Home: Pause the flight and order the drone to return to the home point. Upon reaching the home point, the drone will start the landing procedure unless the grid flight is resumed or manual control is taken.
- Stop: Ends the flight and returns the drone to manual control. A stopped grid flight must be restarted in its entirety; stopped grid flights cannot be resumed.
Resize on initial setup (iOS only)
When creating a new grid flight, the option exists to resize the initial grid size. To change the initial grid size, touch and hold with a finger or stylus on the upper right corner of the grid. If selected properly, the grid lines will disappear and the outside square will become orange. To resize, slide your finger/stylus in for a smaller grid and out for a larger grid.
The resizing of a grid will only work during the initial grid setup, adding any points will cause this functionality to not work. Future application updates will change this behavior.
Moving a grid (iOS only)
The need may arise that a grid flight may need to be moved if, for example, the grid was not in the correct location during the initial creation. Moving a grid within the application is as simple as clicking the + button within the grid with a finger or stylus, waiting for the grid to turn orange, and dragging it to the desired location.
Deleting a flight plan
If the need arises and a flight plan needs to be deleted, locate the proper flight plan and slide a finger or stylus fully to the left. A red delete bar will now appear. If done properly the flight plan will no longer appear.
Advanced Options
For more in-depth settings click Advanced Options at any point during the creation/addition of a grid flight.
Within this menu, you have the ability to change or modify the following options:
- Drone Direction -
- Parallel - Flight plan faces the initial direction of the flight plan and maintains that direction throughout the entirety of the flight, even flying backward where necessary.
- Perpendicular - Drone faces perpendicular to the flight plan at 90 degrees, it attempts to face in a more northerly direction if possible.
- Course Aligned - Drone faces forward throughout the entire flight plan continuously updating direction to face the direction of a row.
- End of Flight Behavior - Return to home or Hover
- Crosshatch - yes/no
- Switch starting waypoint - Swapping starting point and ending point
- Starting Row/Ending Row - Beneficial if there is a need to re-fly a portion of the grid and not the entire grid, the ability to modify the starting grid line and ending grid lines can be set using this option.
Related Articles
Have questions or feedback? Please contact support.groundcontrol@ageagle.com